Sale!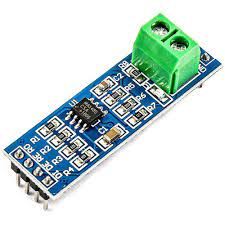
MAX485 TTL To RS485 Module COM53 ,R14
$ 90.60
DescriptionThe MAX485 TTL To RS485 Module converts TTL signal to RS485 for long range, high data rate error prone differential communication. Digital communications networks implementing the EIA-485 standard can be used effectively over long distances and in electrically noisy environments.Multiple receivers may be connected to such a network in a linear, multi-drop configuration. These characteristics make such networks useful in industrial environments and similar applications.This converter lets you send and receive data using the RS485 network from your Arduino /microcontroller. Similar to Serial TTL and RS232 interfaces, the RS485 lets you transfer data between microcontrollers and devices but with extra features! RS485 is an industry standard protocol for data transfer and provides numerous advantages.It lets you transfer data between up to 32 devices, through the same data line over a cable length of up to 1.2km (4000ft) with a maximum data rate of 10Mbit/s. This converter is designed for office and industrial applications (non-isolated) and provides superior characteristics/features normally found only on more expensive units.Features :On-board MAX485 chip, A low power consumption for the RS-485 communication, slew-rate limited transceiver.A low power consumption for the RS-485 communicationOnboard then 5.08 (mm) pitch 2P terminal to facilitate RS-485 communication wiring.Slew-rate limited transceiverAll pins of the chip have been lead to can be controlled through the microcontroller.Convenient RS-485 communication wiringMultiple Units can be connected to the same RS-485 bus wiring.All Chip pins are brought out for proper controls SPECIFICATIONIC ChipMAX485Operating Voltage (VDC)5Length (mm)45Width (mm)15Height (mm)14Weight (gm)4Getting started with the MAX485 TTL To RS485 ModuleIn this tutorial you will learn how to use two modules Max485 TTL to RS485 to communicate with each other one as a slave while other as a master. Master will send a signal to a slave device and slave is there to receive a signal from Master. You can consider it as a simplex communicationHardware requiredArduino UNO x2Max485 TTL to RS485 Module x2Jumper wiresHow a Max485 to RS485 Module WorksRS485 provides for robust serial communications over long distances of up to 1200 meters and in electrically noisy environments and is commonly used in industrial environments. It supports up to 2.5MBit/Sec data rates, but as distance goes up, the maximum data rate that can be supported comes down. You can think of RS-485 as RS232 on steroids. The data starts out as typical TTL level serial as far as the microcontroller is concerned while the RS-485 module takes care of converting the electrical signals between TTL and the differential signaling used by RS-485.Connecting the HardwareUpload the sketch for Master/** RS485 Master Software* Exercise the MAX485 Module. This code runs on the first (Master)device.* Use the RS485_Slave_Test software for the second (Slave) device* This uses the SoftSerial.h library which comes with the Arduino IDE* Pins used for the soft serial port are fairly arbitrary and can be changed* as needed. Just redefine them below.*/#include <SoftwareSerial.h>const int SSERIAL_RX_PIN = 10; //Soft Serial Receive pinconst int SSERIAL_TX_PIN = 11; //Soft Serial Transmit pinconst int SSERIAL_CTRL_PIN= 3; //RS485 Direction controlconst int LED_PIN = 13;const int RS485_TRANSMIT = HIGH;const int RS485_RECEIVE = LOW;// Create Soft Serial Port object and define pins to useSoftwareSerial RS485Serial(SSERIAL_RX_PIN, SSERIAL_TX_PIN); // RX, TXint byteReceived;//===============================================================================// Initialization//===============================================================================void setup(){Serial.begin(9600); // Start the built-in serial portSerial.println(“Master Device”);Serial.println(“Type in upper window, press ENTER”);pinMode(LED_PIN, OUTPUT); // Configure any output pinspinMode(SSERIAL_CTRL_PIN, OUTPUT);digitalWrite(SSERIAL_CTRL_PIN, RS485_RECEIVE); // Put RS485 in receive modeRS485Serial.begin(9600); // Start the RS485 soft serial port}//===============================================================================// Main//===============================================================================void loop(){if (Serial.available()) // A char(byte) has been entered in the Serial Monitor{byteReceived = Serial.read(); // Read the bytedigitalWrite(SSERIAL_CTRL_PIN, RS485_TRANSMIT); // Put RS485 in Transmit modeRS485Serial.write(byteReceived); // Send byte to Remote Arduinodelay(1); // Wait before going back to Receive modedigitalWrite(SSERIAL_CTRL_PIN, RS485_RECEIVE); // Put RS485 back into Receive mode}if (RS485Serial.available()) //Data from the Slave is available{digitalWrite(LED_PIN, HIGH); // Show activity on LEDbyteReceived = RS485Serial.read(); // Read received byteSerial.write(byteReceived); // Show on Serial Monitordelay(10);digitalWrite(LED_PIN, LOW); // Turn LED back off}} Upload the sketch for Slave/** RS485 Slave Software* Exercise the MAX485 Module. This code runs on the second (slave)device.* Use the RS485_Master_Test software for the first (Master) device* This uses the SoftSerial.h library which comes with the Arduino IDE* Pins used for the soft serial port are fairly arbitrary and can be changed* as needed. Just redefine them below.*/#include <SoftwareSerial.h>const int SSERIAL_RX_PIN = 10; //Soft Serial Receive pinconst int SSERIAL_TX_PIN = 11; //Soft Serial Transmit pinconst int SSERIAL_CTRL_PIN = 3; //RS485 Direction controlconst int LED_PIN = 13;const int RS485_TRANSMIT = HIGH;const int RS485_RECEIVE = LOW;// Create Soft Serial Port object and define pins to useSoftwareSerial RS485Serial(SSERIAL_RX_PIN, SSERIAL_TX_PIN);int byteReceived;int byteSent;//===============================================================================// Initialization//===============================================================================void setup(){Serial.begin(9600); // Start the built-in hardware serial portSerial.println(“Slave Device”);pinMode(LED_PIN, OUTPUT); // Configure any output pinspinMode(SSERIAL_CTRL_PIN, OUTPUT);digitalWrite(SSERIAL_CTRL_PIN, RS485_RECEIVE); // Put RS485 in receive modeRS485Serial.begin(9600); // Start the RS485 soft serial port}//===============================================================================// Main//===============================================================================void loop(){// Watch for data coming in on the soft serial port. If found, send a copy to the// hardware port to display on the local serial terminal and also echo a copy back out// the soft serial port to the Master deviceif (RS485Serial.available()) // If data has come in from Master{byteSent = RS485Serial.read(); // Read the byteSerial.write(byteSent); // Show on local Serial Monitor windowdigitalWrite(LED_PIN, HIGH); // Show activity on LEDdelay(10);digitalWrite(SSERIAL_CTRL_PIN, RS485_TRANSMIT); // Put RS485 in Transmit modeRS485Serial.write(byteSent); // Send the byte back to Masterdelay(1); // Wait before going back to Receive modedigitalWrite(SSERIAL_CTRL_PIN, RS485_RECEIVE); // Put RS485 back into Receive modedigitalWrite(LED_PIN, LOW); // Turn LED back off}} Testing the circuitUpload the program to the Arduino board and then open the serial monitor. If it works correctly you should get the following result on the serial monitor.1.Master Serial Monitor (Sender) Slave Serial Monitor (Receiver)
Related products
-
Garnet Triple Sterling Silver Ring; size 7Select options
This product has multiple variants. The options may be chosen on the product page
-
Garnet Faceted Bead EarringsSelect options
This product has multiple variants. The options may be chosen on the product page
-
Garnet Micro Bead Stretchy BraceletSelect options
This product has multiple variants. The options may be chosen on the product page
-
Garnet Tree of Life PendantSelect options
This product has multiple variants. The options may be chosen on the product page