Sale!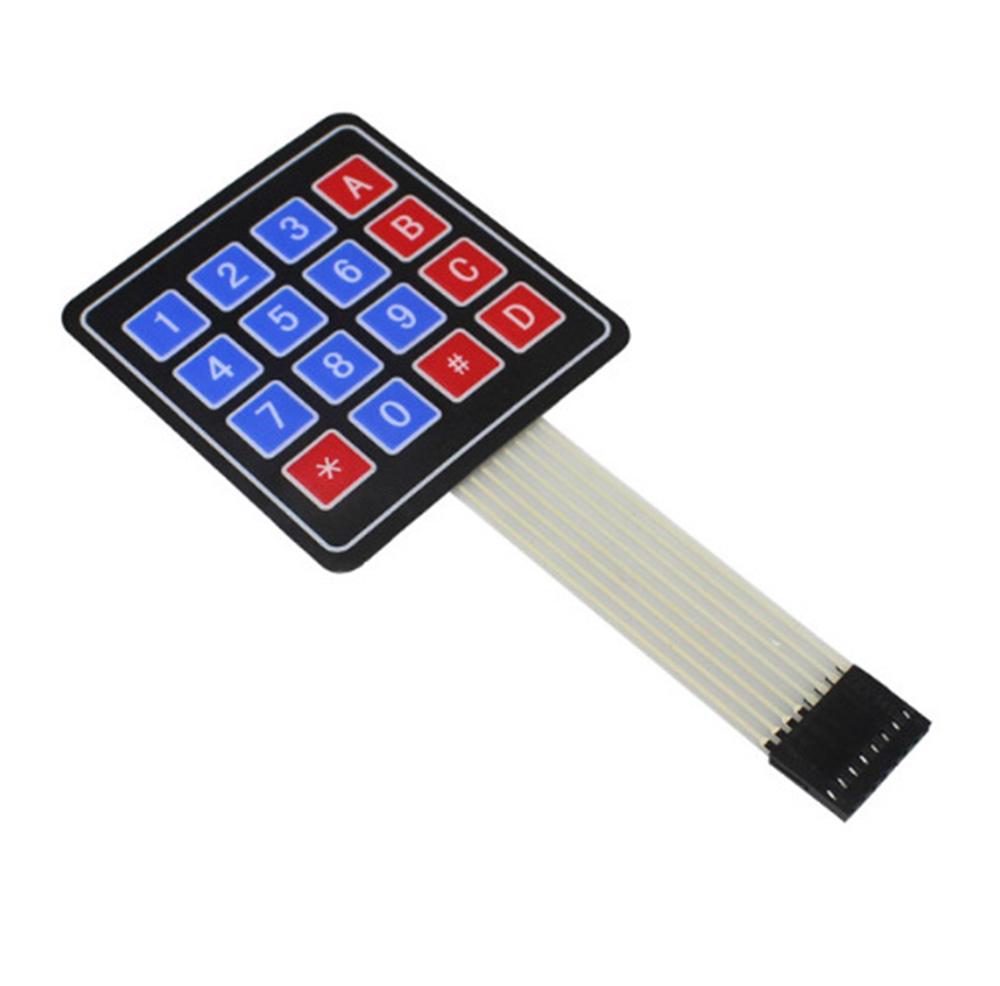
16 Key Membrane Switch Keypad Keyboard 4×4 Matrix Array PRO56 ,R12
$ 92.96
DescriptionWhether you are building a custom smart-home door lock, designing a digital calculator, or creating an interactive menu system for a summer training program, you need a reliable way for users to enter data. The 16-Key 4×4 Membrane Keypad is the most popular, cost-effective solution for adding numerical and directional input to your microcontroller projects.Featuring a classic layout of the numbers 0 through 9, the letters A through D, an asterisk (*), and a hash (#), it provides all the standard inputs needed for access control panels and legacy telecom simulators.The Magic of Matrix ScanningIf you used standard pushbuttons, connecting 16 distinct keys to an Arduino would consume 16 valuable digital pins. This keypad solves that problem by wiring the buttons into a grid (a matrix) of 4 rows and 4 columns. By rapidly scanning these rows and columns in your code, the microcontroller can determine exactly which button is pressed using only 8 digital pins. (Bonus: Programming this is incredibly easy thanks to standard open-source libraries like the Arduino Keypad.h library, which handles all the scanning logic for you!)Peel, Stick, and PlugDesigned for clean, professional installations, the keypad is ultra-thin and features a strong paper-backed adhesive on the rear. Simply peel off the protective layer and stick it directly onto your project box, 3D-printed enclosure, or a wall panel. The flexible ribbon cable terminates in a standard 2.54mm pitch 8-pin female header, allowing you to plug it directly into standard male jumper wires for breadboard prototyping.Key Features:Pin Efficiency: Read 16 buttons using only 8 microcontroller pins.Easy Mounting: Self-adhesive back allows for immediate mounting to flat surfaces.Durable Surface: The membrane overlay is resistant to dust and light moisture.Plug-and-Play: The standard DuPont-style connector works perfectly with standard breadboard jumper cables.Technical Specifications:Key Count: 16 Keys (4×4 Matrix)Maximum Circuit Rating: 35V DC, 100mAContact Bounce: < 5 millisecondsDielectric Withstand: 250V RMS (50-60Hz for 1 minute)Connector Pitch: 2.54mm (0.1″)Cable Length: ~85mm (including connector)Operating Temperature: -20°C to 40°CGetting started with the 16 Key Membrane Switch Keypad Keyboard 4×4 Matrix ArrayWe are going to show how to connect a 4 x 4 Membrane Keypad to an Arduino.Step1: Hardware requiredArduino Uno4 x 4 Membrane KeypadStep2: Connecting the HardwareThe connections are pretty straightforward. Start by connecting pin 1 of keypad to digital pin 9 on Arduino. Now keep on connecting the pins leftwards like 2 with 8, 3 with 7 etc.Step3: Setting up the libraryTo install the library navigate to the Sketch > Include Library > Manage Libraries…Wait for Library Manager to download libraries index and update list of installed libraries.Filter your search by typing ‘keypad’. There should be a couple entries. Look for Keypad by Mark Stanley, Alexander Brevig. You have to scroll a little bit. Click on that entry, and then select Install.Step4: Upload the Code#include <Keypad.h> const byte ROWS = 4; //four rows const byte COLS = 4; //four columns char keys[ROWS][COLS] = { {'1','2','3','A'}, {'4','5','6','B'}, {'7','8','9','C'}, {'*','0','#','D'} }; byte rowPins[ROWS] = {9, 8, 7, 6}; //connect to the row pinouts of the keypad byte colPins[COLS] = {5, 4, 3, 2}; //connect to the column pinouts of the keypad //Create an object of keypad Keypad keypad = Keypad( makeKeymap(keys), rowPins, colPins, ROWS, COLS ); void setup(){ Serial.begin(9600); } void loop(){ char key = keypad.getKey();// Read the key // Print if key pressed if (key){ Serial.print("Key Pressed : "); Serial.println(key); }}Step5: Testing the circuitHere’s how the output looks like in the serial monitor. Package includes: 1×16 Keys Membrane Switch Keypad
Related products
-
Garnet Micro Bead EarringsSelect options
This product has multiple variants. The options may be chosen on the product page
-
Garnet Micro Bead Stretchy BraceletSelect options
This product has multiple variants. The options may be chosen on the product page
-
Garnet Triple Sterling Silver Ring; size 7Select options
This product has multiple variants. The options may be chosen on the product page
-
Garnet Quadruple Faceted Sterling Silver PendantSelect options
This product has multiple variants. The options may be chosen on the product page