Sale!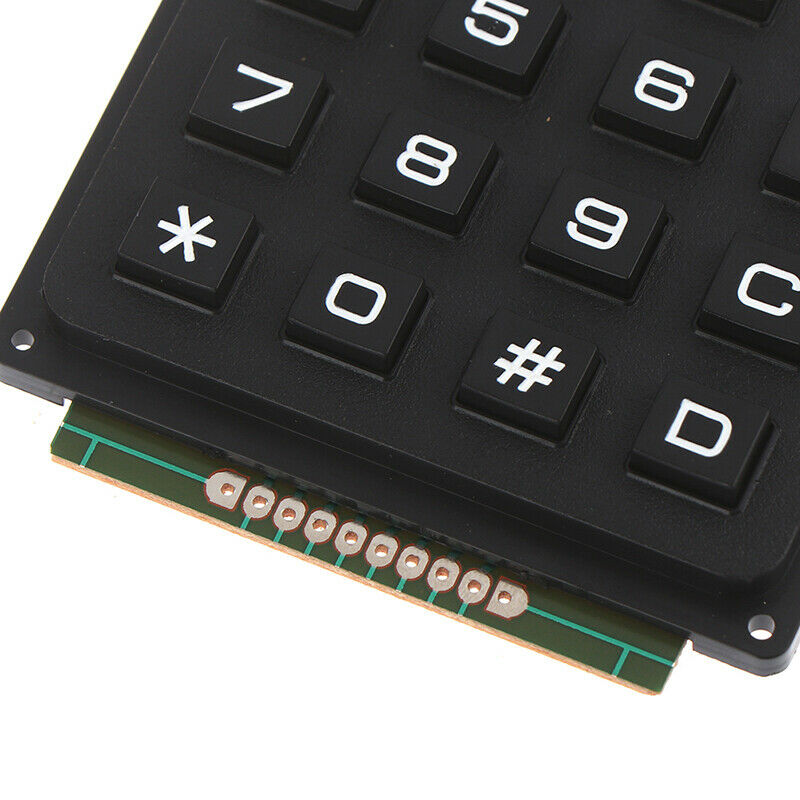
4 x 4 16 Keys Matrix Array 4*4 Switch Keypad Keyboard Module for Arduino PRO44 ,R17
$ 99.45
DescriptionThis high quality 4×4 Keypad Matrix lets you quickly add controls to your electronics projects. It offers 0-9 numerals, A-D letters, and standard star(*) and hash(#) symbols.Features: 100% brand new and high quality.16 Button Matrix 0-9 # * A-DExcellent price-performance ratio Easy communication with any microcontrollerGetting started with the 16 Key Membrane Switch Keypad Keyboard 4x4x4 Matrix ArrayWe are going to show how to connect a 4 x 4 Membrane Keypad to an Arduino.Step1: Hardware requiredArduino Uno4 x 4 Membrane KeypadStep2: Connecting the HardwareThe connections are pretty straightforward. Start by connecting pin 1 of keypad to digital pin 9 on Arduino. Now keep on connecting the pins leftwards like 2 with 8, 3 with 7 etc.Keypad Arduino UNOPIN 1 Connected to Pin 9PIN2 Connected to Pin 8PIN3 Connected to Pin 7PIN4 Connected to Pin 6PIN5 Connected to Pin 5PIN6 Connected to Pin 4PIN7 Connected to Pin 3PIN8 Connected to Pin 2 Step3: Upload the Code#include “Adafruit_Keypad.h”const byte ROWS = 4; // rows const byte COLS = 4; // columns //define the symbols on the buttons of the keypads char keys[ROWS][COLS] = { {‘1′,’2′,’3′,’A’}, {‘4′,’5′,’6′,’B’}, {‘7′,’8′,’9′,’C’}, {‘*’,’0′,’#’,’D’} }; byte rowPins[ROWS] = {5, 4, 3, 2}; //connect to the row pinouts of the keypad byte colPins[COLS] = {9, 8, 7, 6}; //connect to the column pinouts of the keypad//initialize an instance of class NewKeypad Adafruit_Keypad customKeypad = Adafruit_Keypad( makeKeymap(keys), rowPins, colPins, ROWS, COLS);void setup() { Serial.begin(9600); customKeypad.begin();}void loop() { // put your main code here, to run repeatedly: customKeypad.tick();while(customKeypad.available()){ keypadEvent e = customKeypad.read(); Serial.print((char)e.bit.KEY); if(e.bit.EVENT == KEY_JUST_PRESSED) Serial.println(” pressed”); else if(e.bit.EVENT == KEY_JUST_RELEASED) Serial.println(” released”); }delay(10); }Step4: Testing the circuitHere’s how the output looks like in the serial monitor.
Related products
-
Garnet Tree of Life PendantSelect options
This product has multiple variants. The options may be chosen on the product page
-
Garnet Faceted Bead BraceletSelect options
This product has multiple variants. The options may be chosen on the product page
-
Garnet Quadruple Faceted Sterling Silver PendantSelect options
This product has multiple variants. The options may be chosen on the product page
-
Garnet Oval Faceted Sterling Silver PendantSelect options
This product has multiple variants. The options may be chosen on the product page